
A Flavorful Adventure Under the Stars 🌮🔥
Imagine sitting around a crackling campfire, the smell of smoky meat blending with the earthy scent of the forest, and the warmth of the flames lighting up the night. This is the essence of campfire carnitas – a simple yet flavorful dish that brings the heart of Mexican cuisine to your campsite. Whether you’re in the great outdoors or cooking in your backyard, this easy-to-make recipe delivers tender, juicy pork with a smoky, charred finish that’s perfect for tacos, burritos, or even as a topping for nachos.
In this guide, we will walk you through the process of creating campfire carnitas, complete with all the necessary ingredients, a step-by-step cooking method, variations for dietary preferences, and tips to make the most of your campfire cooking experience. Ready to light up your fire and make some magic in your camp kitchen? Let’s get started!
Ingredients 🛒
To create the perfect campfire carnitas, you’ll need the following ingredients:
Main Ingredients:
-
2 lbs pork shoulder (or pork butt) 🐖: The best cut for carnitas, as it becomes incredibly tender and flavorful when slow-cooked.
-
2 tablespoons olive oil 🫒: For searing the pork before cooking it over the campfire.
-
1 onion 🧅: Finely chopped to add sweetness and depth to the dish.
-
4 cloves garlic 🧄: Minced, for a savory punch.
-
1 orange 🍊: Juice and zest will add brightness and a touch of sweetness.
-
1 lime 🍋: Fresh lime juice to balance the richness of the pork.
-
2 bay leaves 🍃: For added herbal flavor.
-
1 teaspoon cumin 🌿: A warm spice that adds a subtle depth.
-
1 teaspoon smoked paprika 🔥: For that smoky flavor that defines carnitas.
-
1 teaspoon dried oregano 🌿: To bring in a touch of earthiness.
-
1 teaspoon chili powder 🌶️: Optional, but adds a kick of heat.
-
Salt and pepper 🧂: To taste.
For the Cooking Liquid:
-
1 cup chicken broth 🍲: For braising the pork and keeping it moist.
-
1/2 cup beer (optional) 🍺: A splash of beer adds richness and helps tenderize the meat. You can also use more chicken broth as a substitute.
Step-by-Step Instructions 🔥
Step 1: Prepare the Pork
Start by trimming any excess fat from the pork shoulder (though leaving a bit of fat will enhance the flavor). Cut the pork into large chunks, about 2-3 inches each. This helps ensure the pork cooks evenly and absorbs the flavors of the seasonings.
Step 2: Season the Pork
In a large bowl, combine the cumin, smoked paprika, oregano, chili powder (if using), salt, and pepper. Rub this spice mix generously all over the pork pieces. Don’t be shy – the more seasoning, the better!
Step 3: Heat the Campfire Cooking Equipment
If you’re cooking directly over the campfire, you’ll need a sturdy, heatproof cast-iron Dutch oven. If you’re not using one, a campfire-safe pot with a lid will work too. Place your pot over the fire or on a grill grate to preheat.
Add the olive oil to the pot and let it heat up until it’s shimmering but not smoking.
Step 4: Sear the Pork
Once the oil is hot, add the seasoned pork pieces to the pot. Brown the pork on all sides, about 3-4 minutes per side. This step adds a rich, caramelized flavor to the carnitas.
Step 5: Add the Aromatics
Add the chopped onion and garlic to the pot, stirring occasionally, and cook until they’re softened and fragrant, about 3-5 minutes.
Step 6: Add the Liquid
Squeeze the juice of the orange and lime into the pot, and add the zest from both fruits as well. Pour in the chicken broth and beer (if using). Stir to combine, scraping any bits of browned meat off the bottom of the pot.
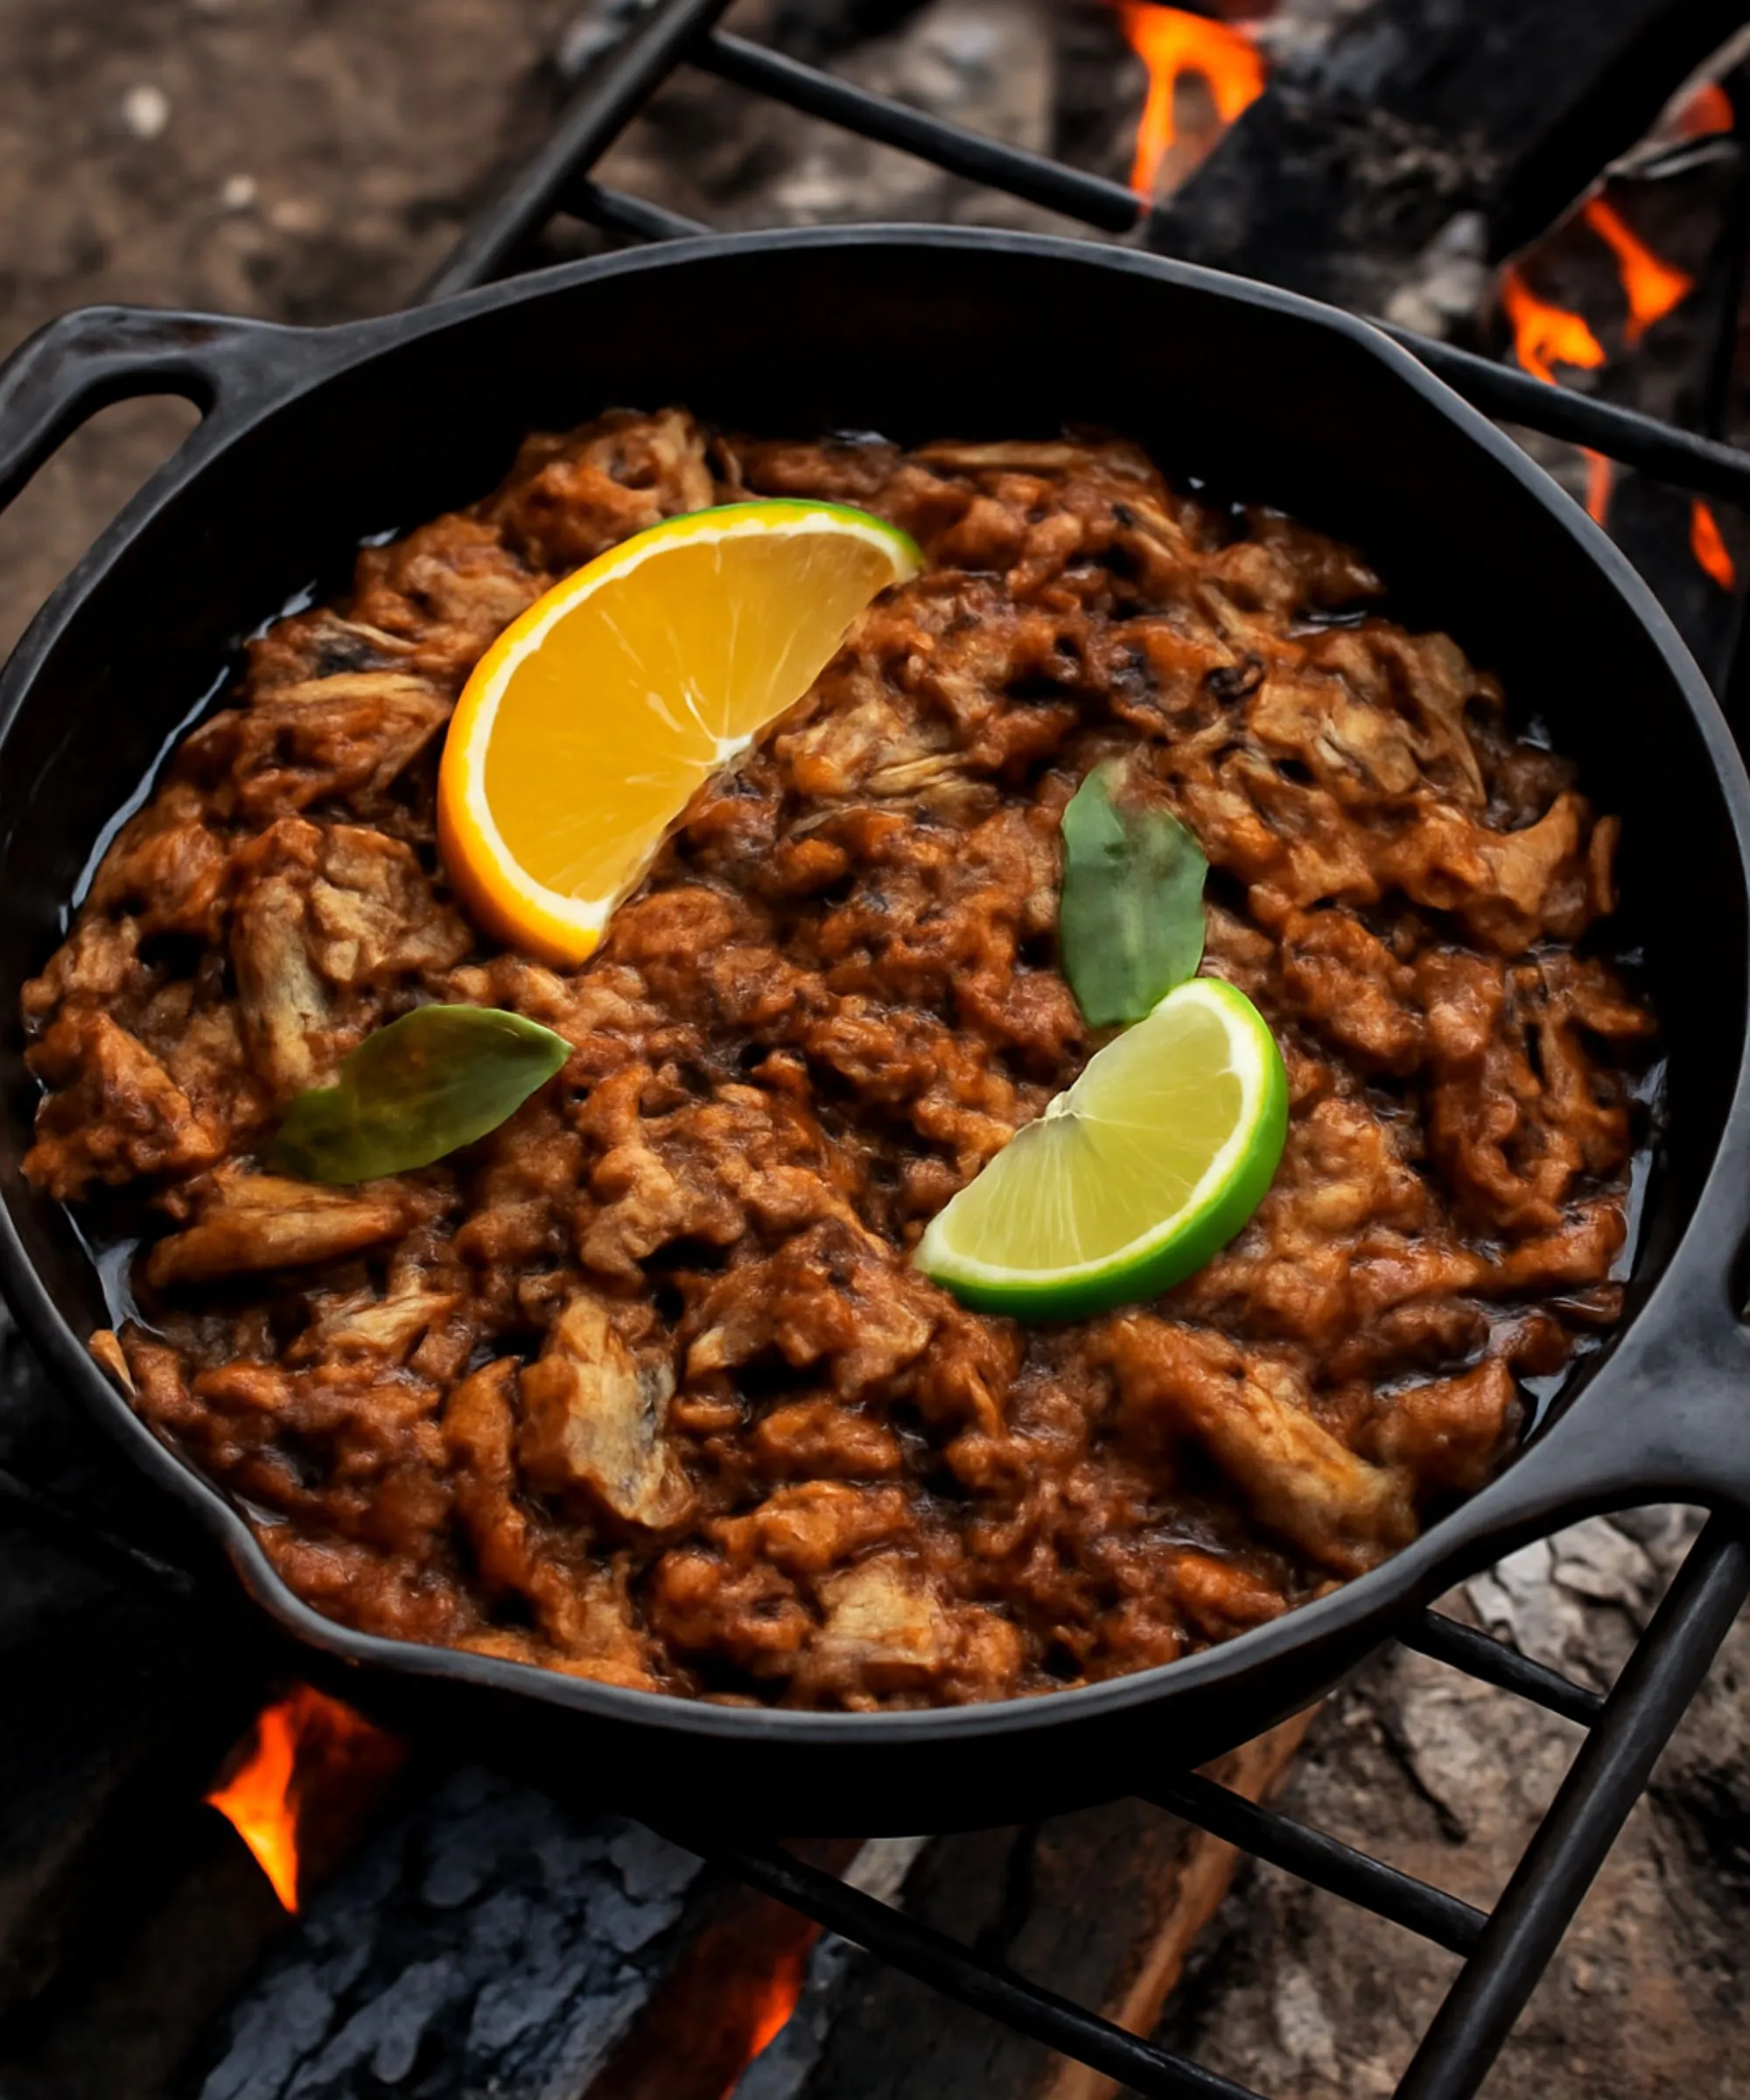
Add the bay leaves to the pot, and cover the pot with its lid. If you don’t have a lid, you can cover the pot with heavy-duty aluminum foil.
Step 7: Slow Cook Over the Campfire
Now, this is the key to perfect carnitas: the slow cooking process. Lower the heat of the fire and let the pork simmer gently for about 2-3 hours, stirring occasionally. You want the pork to be very tender and easily shreddable. If you’re using a Dutch oven, you can also bury it in hot coals to maintain a consistent temperature.
Step 8: Shred the Pork
Once the pork is tender and falling apart, use two forks to shred the meat directly in the pot, stirring it into the juices. If the liquid hasn’t evaporated, increase the heat to allow it to reduce, concentrating the flavors.
Step 9: Crisp the Carnitas (Optional but Recommended)
For an extra crispy texture, return the shredded pork to the pot without any liquid and cook over direct heat for 10-15 minutes. Stir occasionally until the pork gets a crispy, golden-brown exterior.
Tips for Perfect Campfire Carnitas 🔥
-
Adjust the Heat: Cooking over a campfire can be tricky with fluctuating temperatures. Keep the heat low and check on the meat regularly.
-
Use a Meat Thermometer: If you’re uncertain about the cooking time, use a meat thermometer. The pork should reach an internal temperature of about 190°F (88°C) for that perfect shredding texture.
-
Don’t Rush: The longer you cook the pork, the more tender and flavorful it will become. Let it braise slowly over the fire for the best results.
-
Use a Lid: If possible, use a lid or cover the pot with aluminum foil. This will trap the steam and keep the pork moist.
-
Control the Smoke: If you’re cooking directly over the fire, you can infuse the carnitas with more smoke by cooking it over indirect heat, such as on the edge of the fire or in the coals.
Variations 🌱
Vegan Carnitas
For a vegan alternative, you can substitute the pork with jackfruit, which has a similar texture when shredded. Simply follow the same steps, replacing the pork with young green jackfruit packed in brine. It absorbs the flavors of the seasoning beautifully and is a perfect plant-based option for carnitas.
Gluten-Free Carnitas
The traditional campfire carnitas recipe is naturally gluten-free, so you don’t need to make any modifications if you’re following a gluten-free diet. Just ensure that your tortillas and other accompaniments are also gluten-free.
High-Protein Carnitas
If you’re looking for a high-protein option, consider swapping the pork with chicken thighs or turkey. These cuts will yield a leaner result but still deliver a juicy and flavorful outcome.
Serving Suggestions 🌮
-
Tacos: The classic way to serve carnitas is in soft corn tortillas, topped with fresh cilantro, diced onions, a squeeze of lime, and your favorite salsa.
-
Burritos: For a heartier meal, wrap the carnitas in a large flour tortilla with rice, beans, guacamole, and cheese.
-
Nachos: Layer tortilla chips with carnitas, melted cheese, jalapeños, and a drizzle of sour cream for a fun twist.
-
Salads: For a lighter option, pile the carnitas onto a bed of fresh greens, adding avocado, tomatoes, and a tangy dressing.
Nutrition Information (Per Serving) 🍽️
While campfire carnitas are undeniably delicious, here’s a breakdown of what you can expect nutrition-wise for a standard serving (about 1/4 pound of meat):
-
Calories: 400
-
Protein: 30g
-
Carbs: 5g
-
Fat: 30g
-
Fiber: 1g
-
Sodium: 300mg
Keep in mind that if you add tortillas, rice, or beans, the nutritional content will change accordingly. Opt for whole wheat tortillas or low-carb options for a healthier alternative.
Storage Guide 📦
If you have leftovers, lucky you! Here’s how to store them:
-
Refrigerator: Let the carnitas cool to room temperature before placing them in an airtight container. They’ll keep for up to 4 days in the fridge.
-
Freezer: To freeze, place the carnitas in a freezer-safe bag or container. It will last for up to 3 months. To reheat, thaw overnight in the fridge and warm it up over medium heat.
Conclusion 🎉
Campfire carnitas are the ultimate way to bring friends and family together under the stars for a fun, flavorful, and unforgettable meal. With their rich, smoky flavor, tender texture, and versatility, they’re perfect for tacos, burritos, and more. Plus, the joy of cooking over an open fire adds a whole new level of excitement to the meal. Whether you’re cooking on a camping trip or in your backyard, these carnitas will definitely impress. Don’t forget to experiment with the variations and serve them in your favorite way!
So, gather your ingredients, light up the fire, and get ready for a feast you’ll never forget. Happy cooking! 🌮🔥